

Think Your Ad Strategy Still Works in 2023?
Get the most comprehensive guide to building the exact workflow we use to drive kickass ROAS for our customers.


The Business Suite is a must to manage your business social accounts easily on Meta. In this article, I’m going to help you set it up, manage your team’s access, and take you through some of its best features.
Meta Business Suite is a handy business tool that empowers businesses to manage their social media presence across various Meta platforms, including Facebook, Instagram, and WhatsApp. It serves as a centralized hub for coordinating content, engaging with customers, and analyzing performance, providing a holistic solution for businesses to thrive online.
Yes, Meta Business Suite is free to use, making it an accessible and cost-effective solution for businesses of all sizes. Once you create a Facebook Page or an Instagram business account, you can access Meta Business Suite via desktop or mobile app.
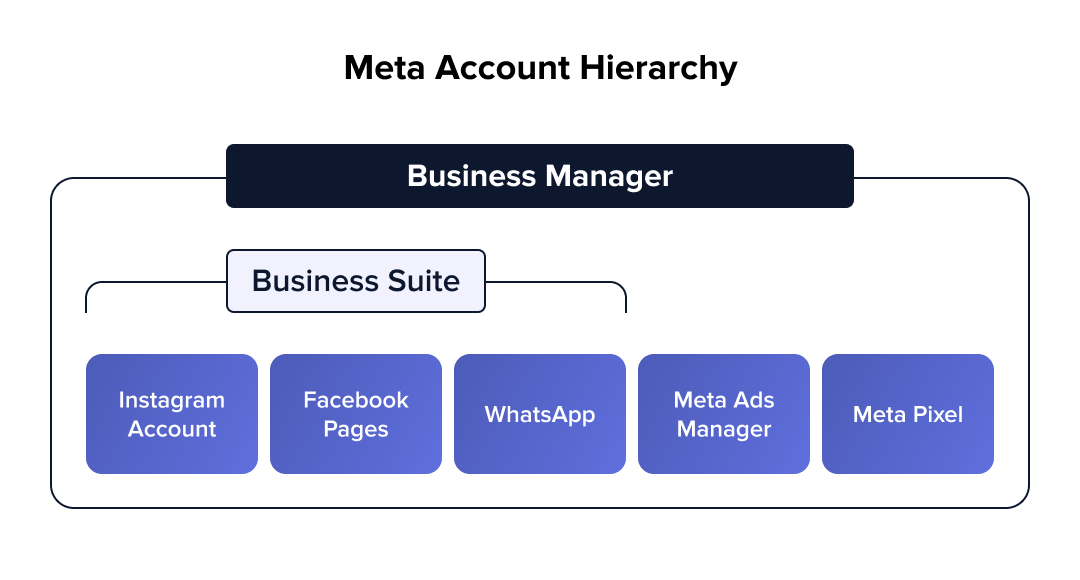
First of all, it’s important to understand that the Business Suite and Business Manager are not the same. While Meta Business Manager primarily focuses on advertising campaigns and asset organization, the Meta Business Suite encompasses various tools for content creation, scheduling, customer engagement, and data analysis. Social media managers and community managers use it predominantly as a way to manage all aspects of distributing content.
Setting up Meta Business Suite is a simple process that can be done in a few steps. All you need is a Facebook Page or an Instagram business account.
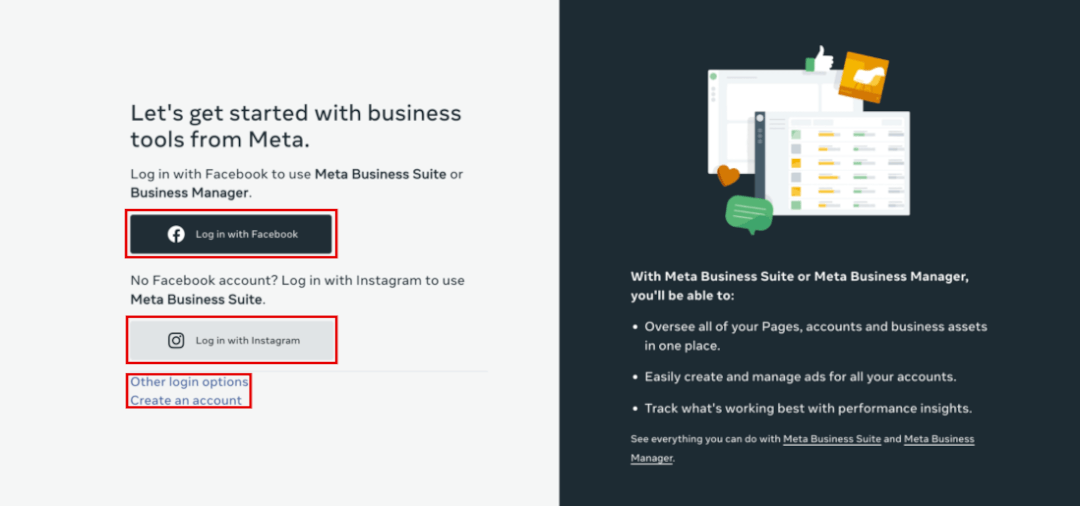
1. First, visit the login page and click ‘Create an account.’ You’ll be asked to either log into an existing Facebook or Instagram account or create one.
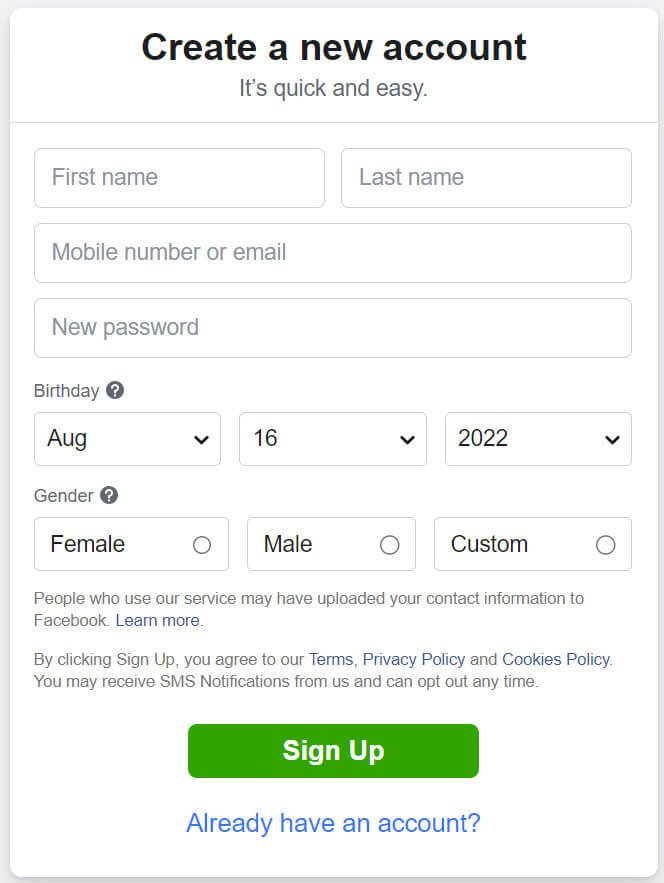
2. If you’re creating a new business account, you’ll be asked for the details below. These details won’t be visible to the public, but Facebook will use them to contact you.
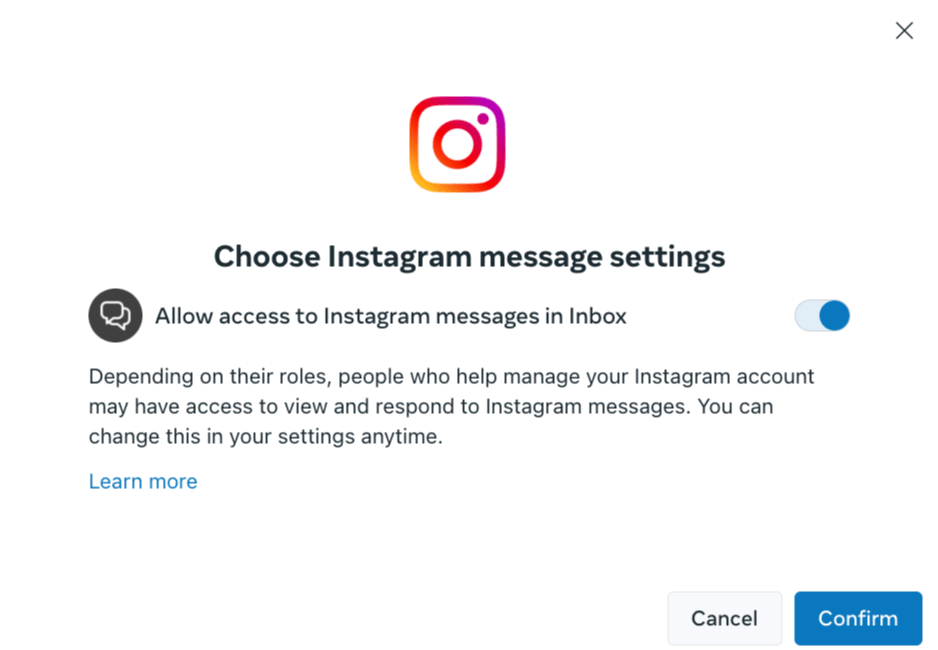
If you’re connecting an existing account, a popup will appear, prompting you to confirm your settings and asking if you want to continue to set up Meta Business Suite.
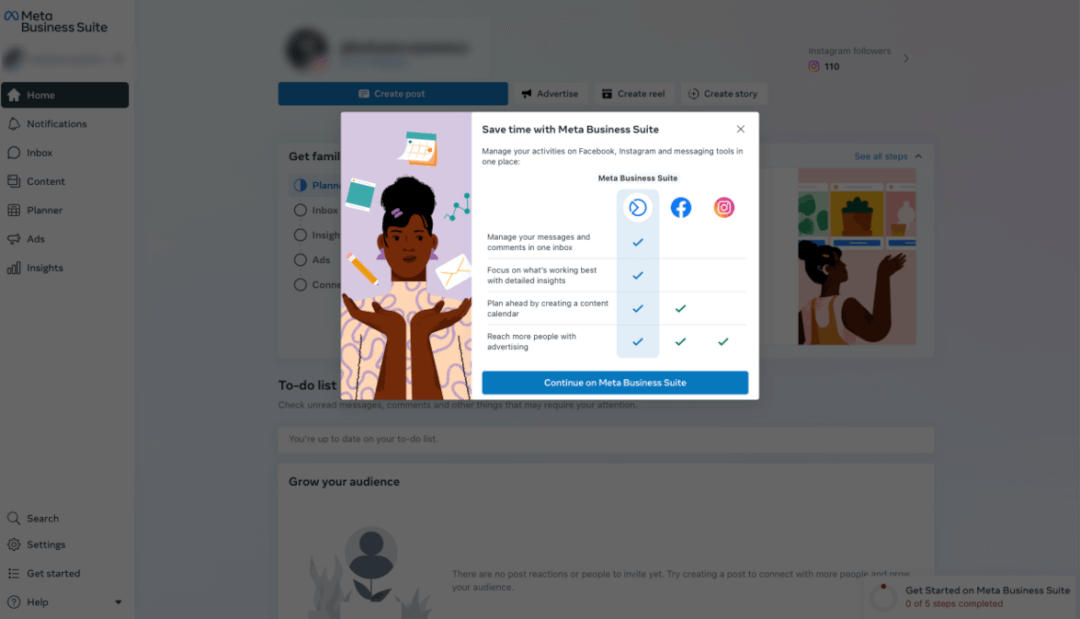
3. Once you’ve confirmed your settings, you’ll see the below view with an overview of how you can benefit from using Meta Business Suite. Click on the ‘Continue on Meta Business Suite’ button.
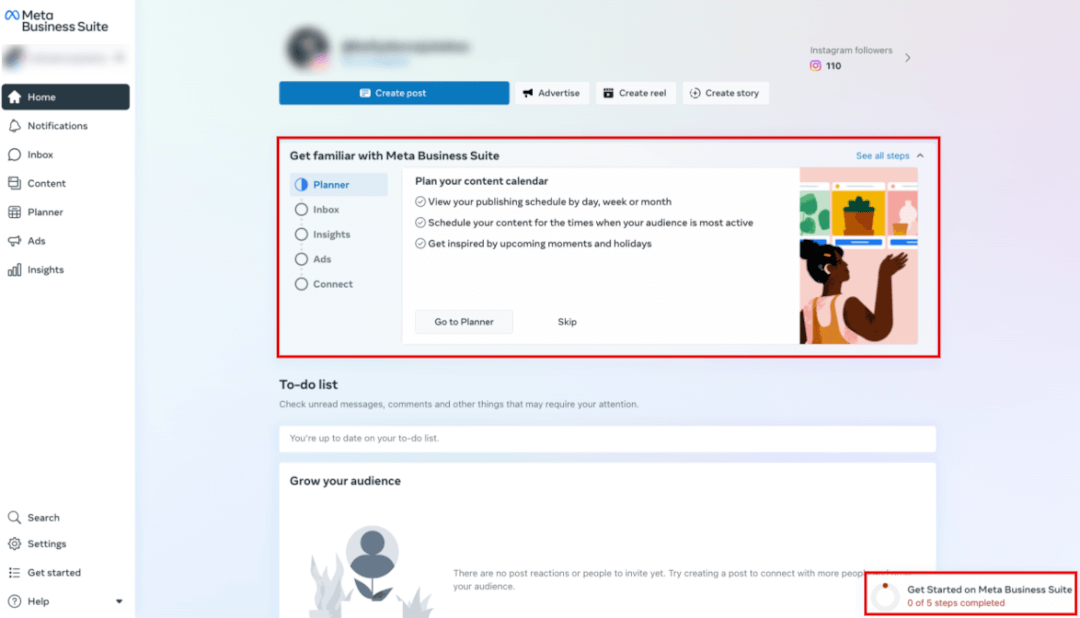
4. Once you land on the Meta Business Suite page, you should see a guide to show you what’s under the hood. It’s a great idea to go through this so you better understand how it works. However, you can always come back to this later.
5. Then, at the bottom right, you’ll see your setup progress showing there are more steps to complete. That’s where we’re going, so click on it.
6. Now, you will see the “Getting Started” page with a list of the recommended actions you should take next.
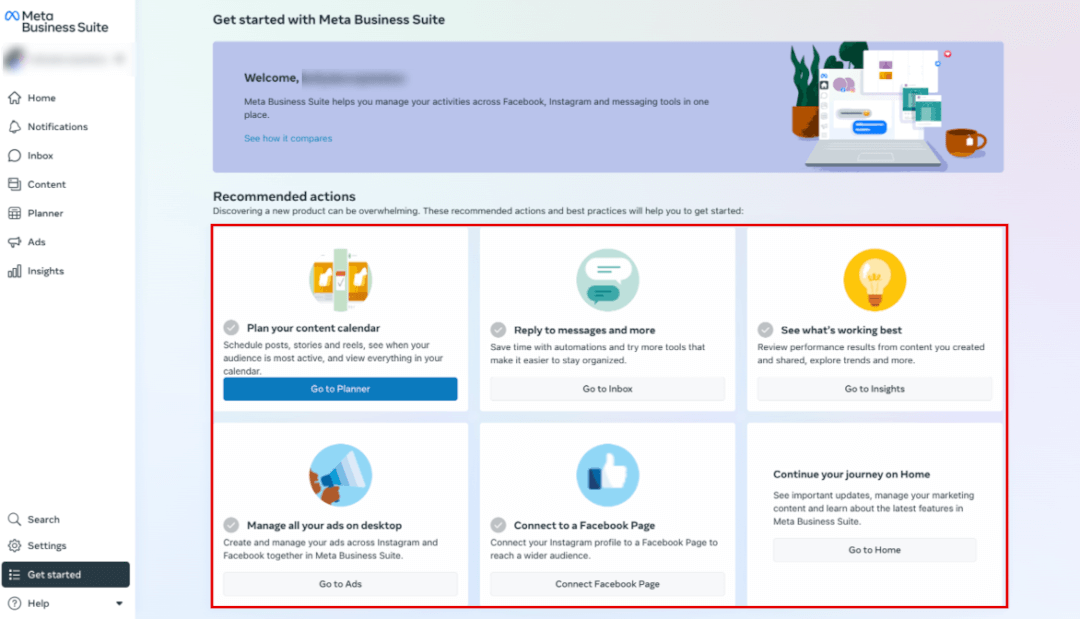
7. At the bottom of the page, you’ll find where to access a tour on how to switch between accounts to get to the Pages, profiles, and Instagram accounts you manage. You can also easily download the mobile app here.

The great thing about Meta Business Suite is that every time you log in, your recommended next steps will be on the home page as a to-do list, so you can easily pick up where you left off if you don’t complete everything in one session.
8. Add your business details by going to “Settings” on the side menu on the bottom left.

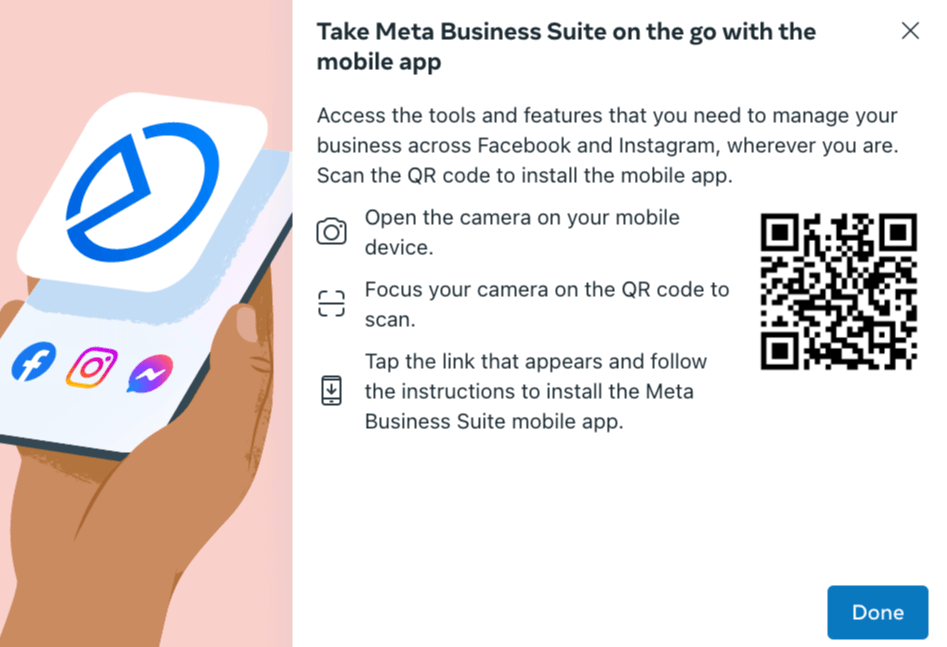
Now that we’ve set it up, let’s go over how to use it effectively. It’s important to note that everything you can do on the desktop version, you can do on the mobile app. That said, I prefer the desktop version. Here is a QR code where you can download the app.
Here's a comprehensive guide on using its essential functions:
Meta Business Suite allows you to add team members and grant them permission to access assets, such as your Facebook Page, Instagram account, and WhatsApp account. This can also be useful if you outsource your social media content management.
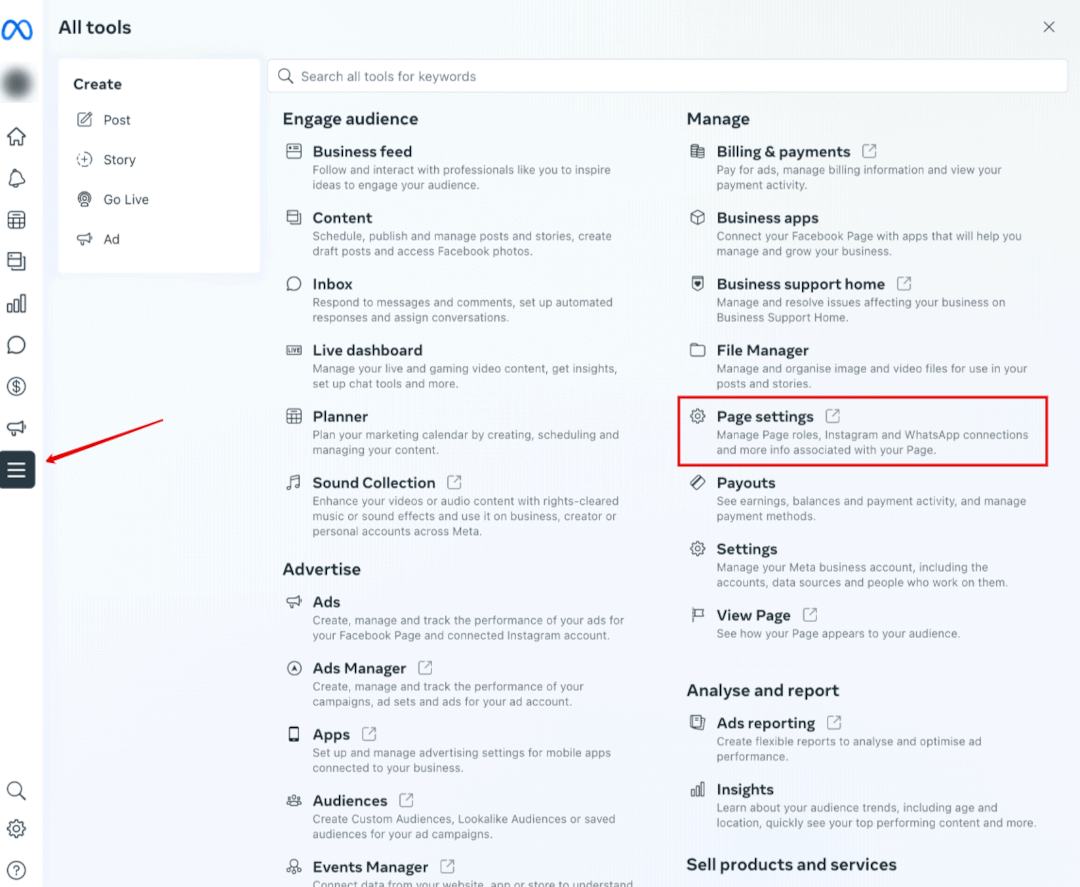
1. If you click on the ‘All Tools’ menu tab or the three-line menu button on the left-hand side of the screen, the below menu will pop out. Click on ‘Page settings.’
2. This screen may appear depending on your settings. If it does, click on ‘New Pages experience.’

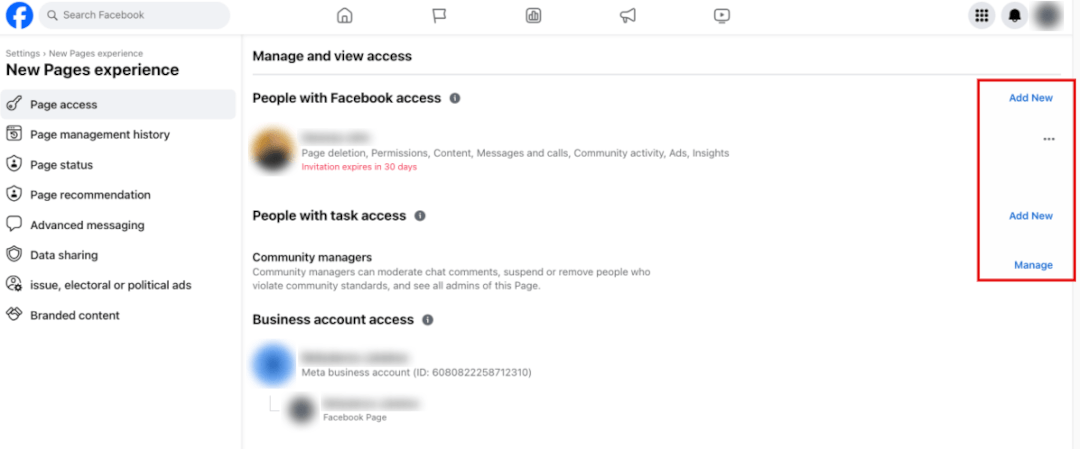
3. On the New Pages experience page at the top of the menu on the left, you’ll see the first tab is ‘Page access.’ A list of all people with access will be listed with options to ‘Add New’ and ‘Manage’ access on the far right. You can choose to assign full Facebook access with the top option, or you can assign specific task access to people below it. Should your business accounts require community management, you can assign managers and manage their access by clicking the ‘Manage’ button.
4. A popup will confirm the level of access you want to grant and prompt you to enter the name of the person you want to add. Once you complete the steps, your team members will receive an invite, which they must accept before they have access.
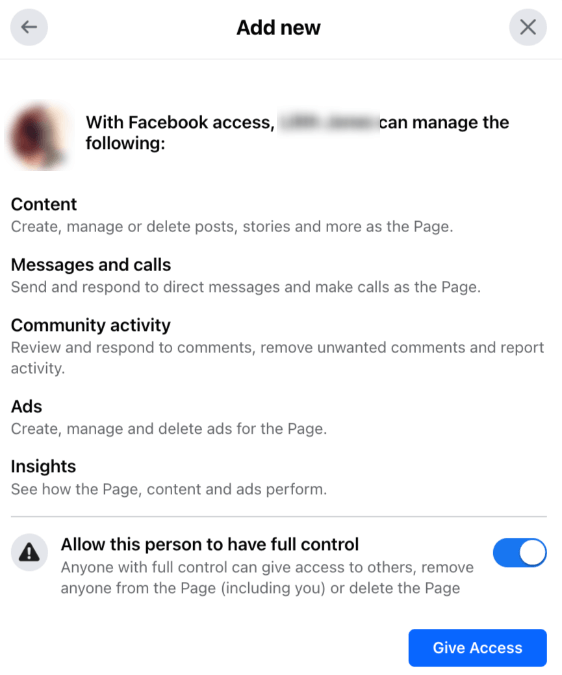
There are varying levels or areas of access you can grant other people between content, community activity across your pages, ads, and insights. You can choose by sliding the toggle to customize access.
Notes:
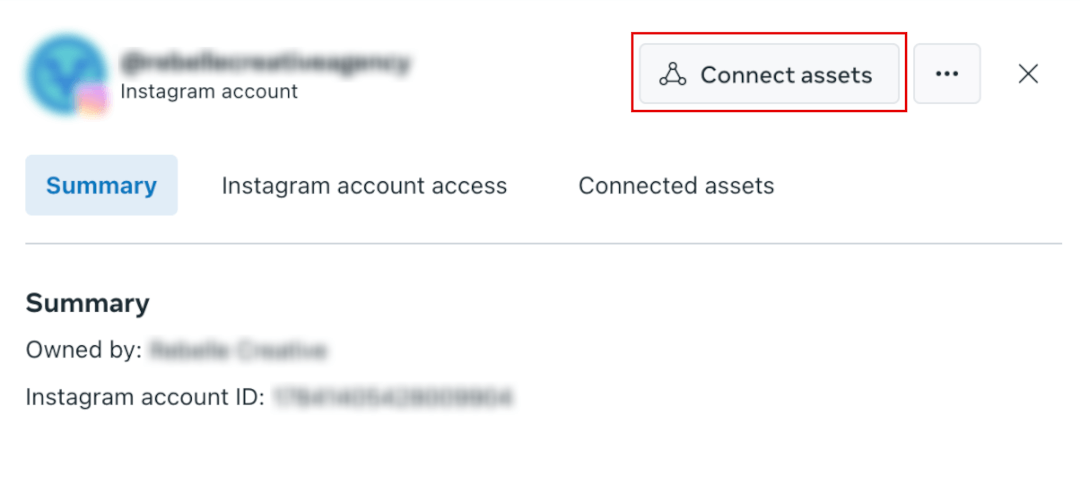
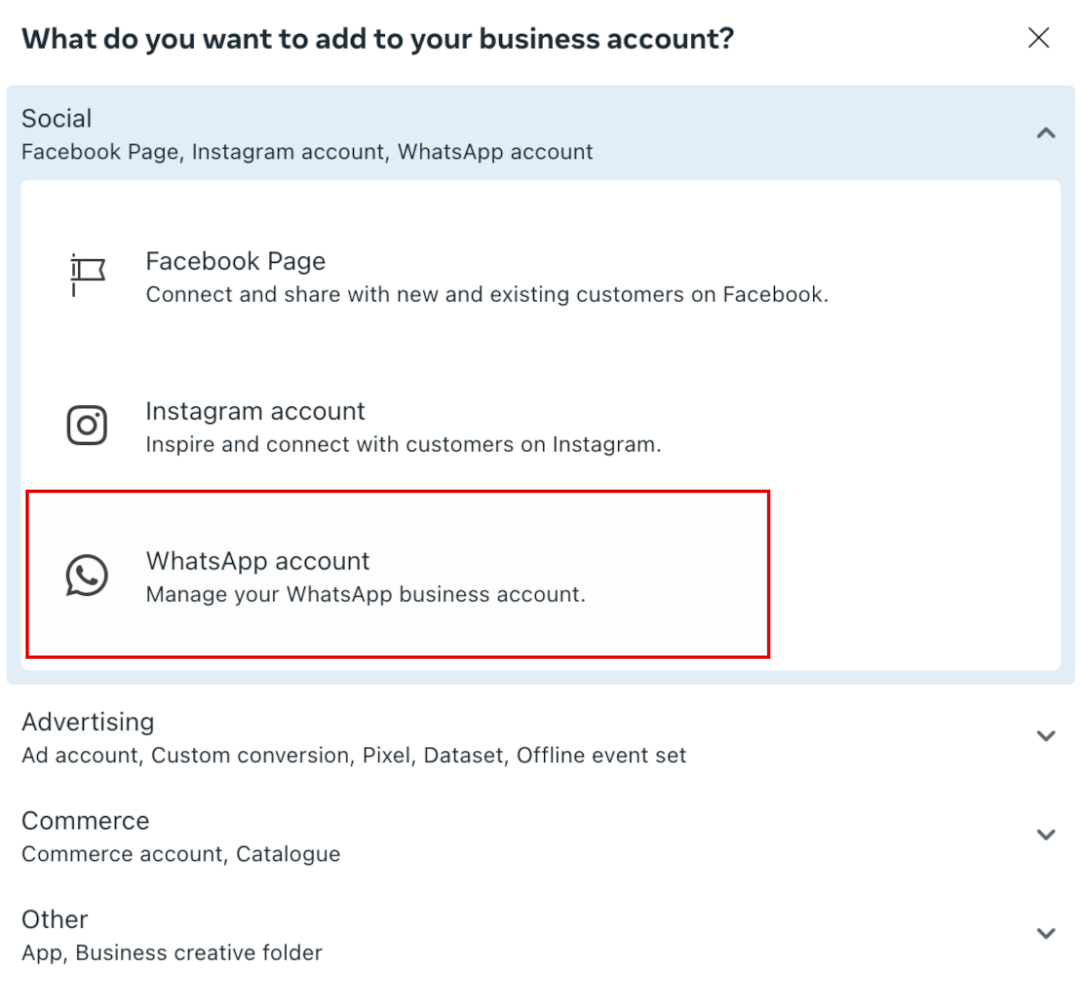
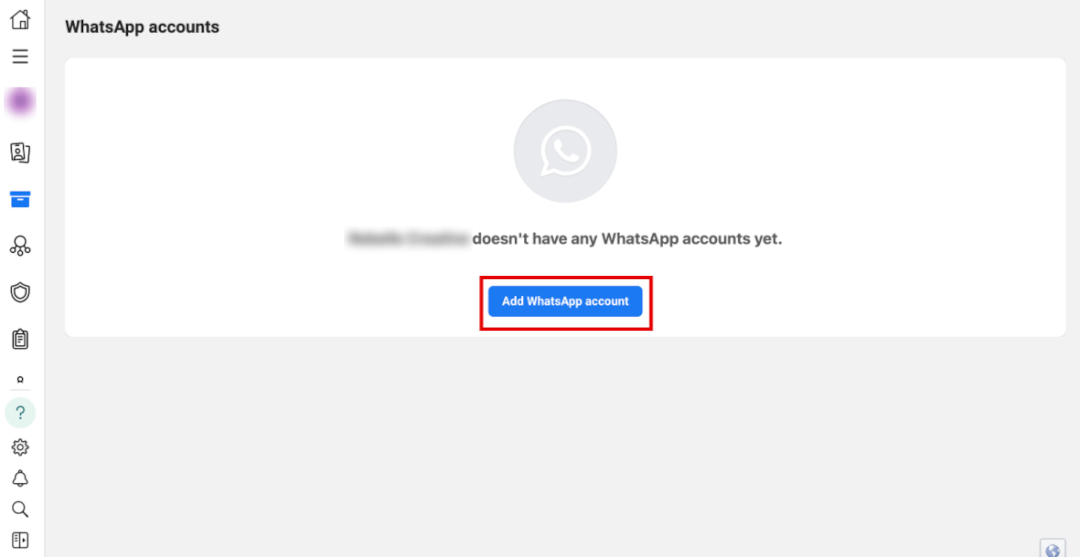
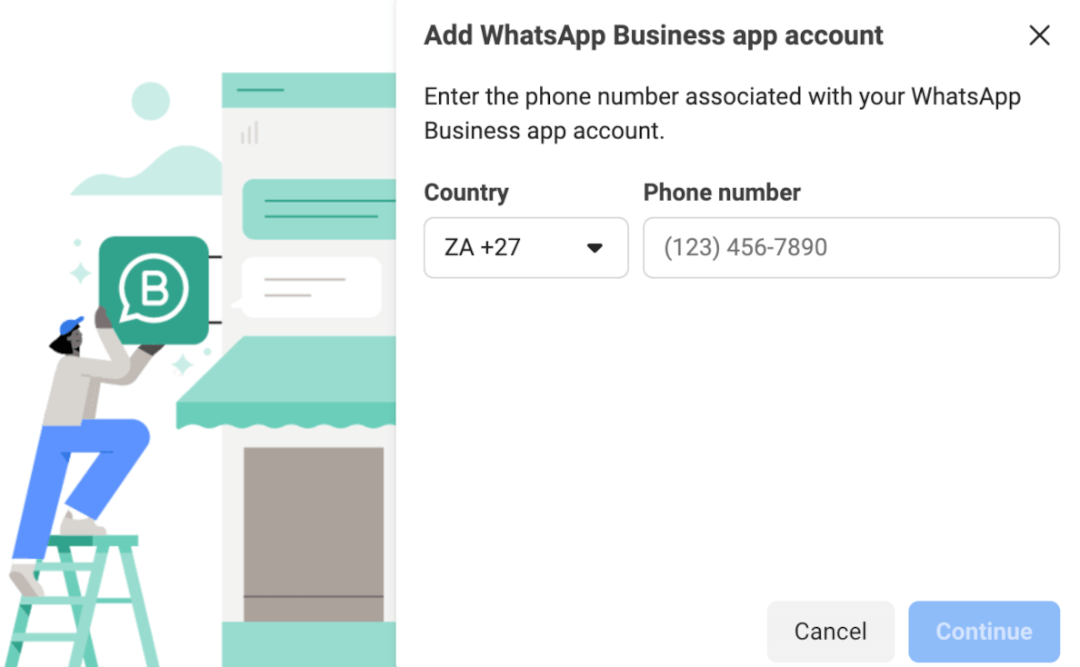
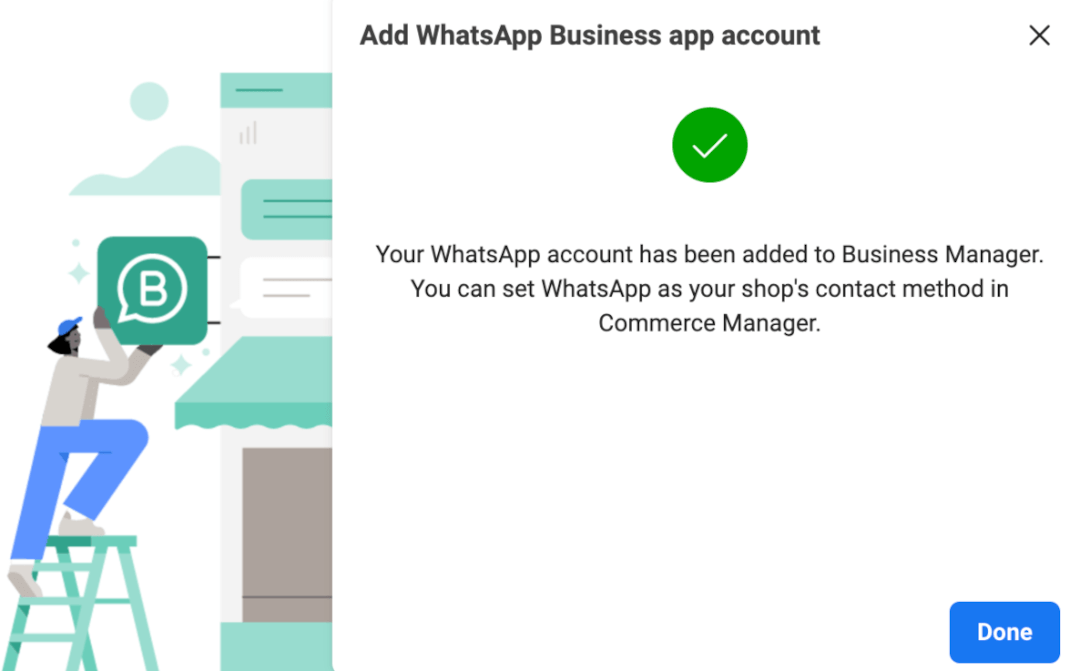
As your Facebook Page is already connected to your Business Suite at this stage, now it’s time to add the rest so you have all your eggs in one basket.

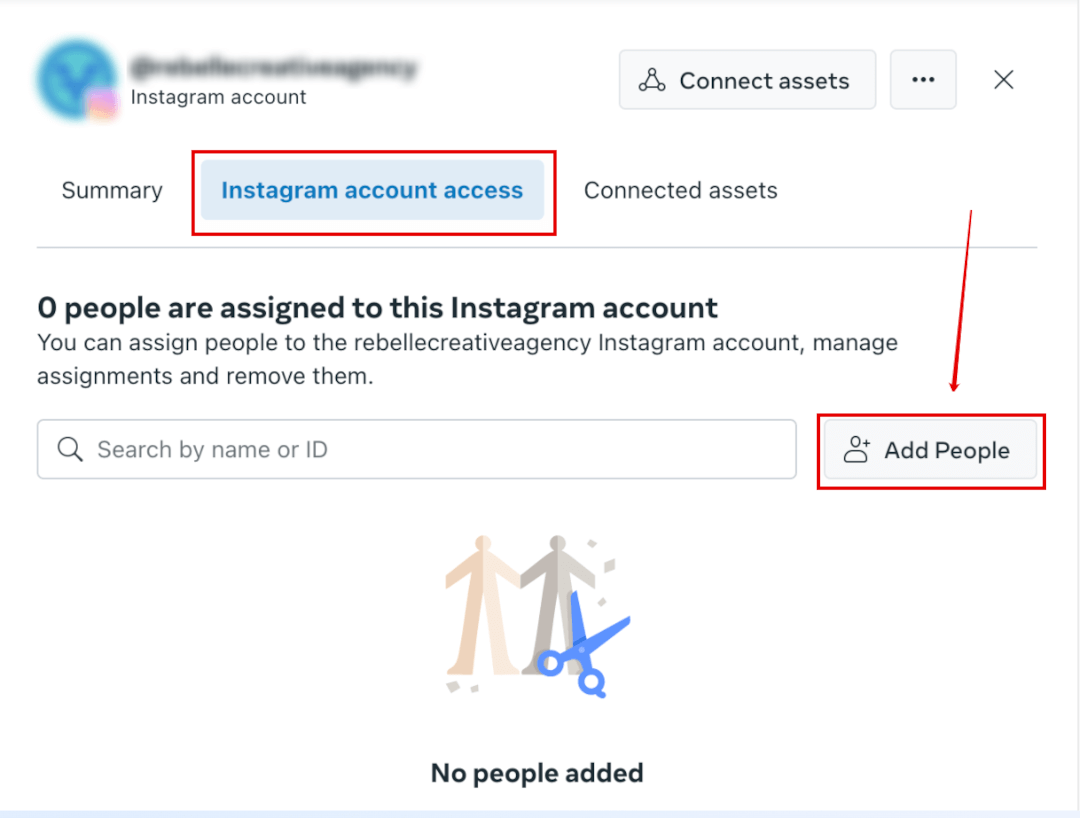
This familiar popup should appear where you can select the names of people who’ve already been added. You can also type in an email address, user ID, or their name to add a new user.
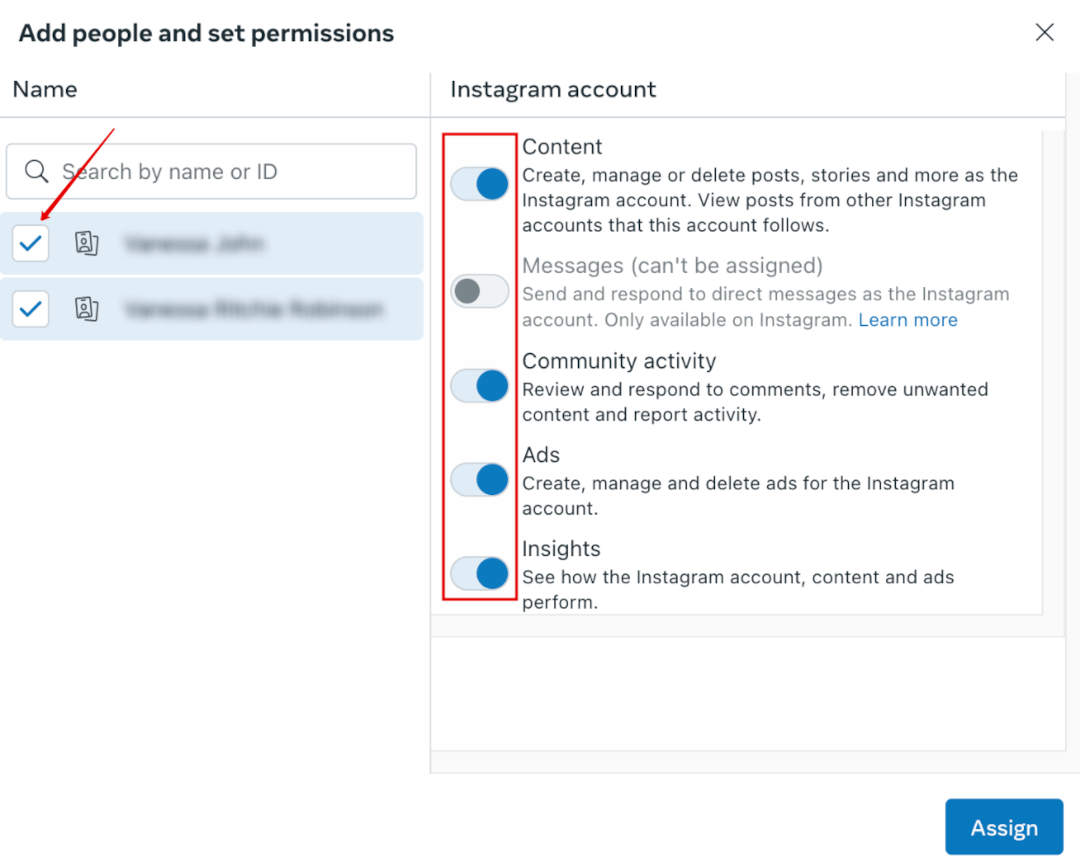
Once you hit ‘Assign,’ your user must accept the request. Only then will your new user gain access.
Notes:
Notes:
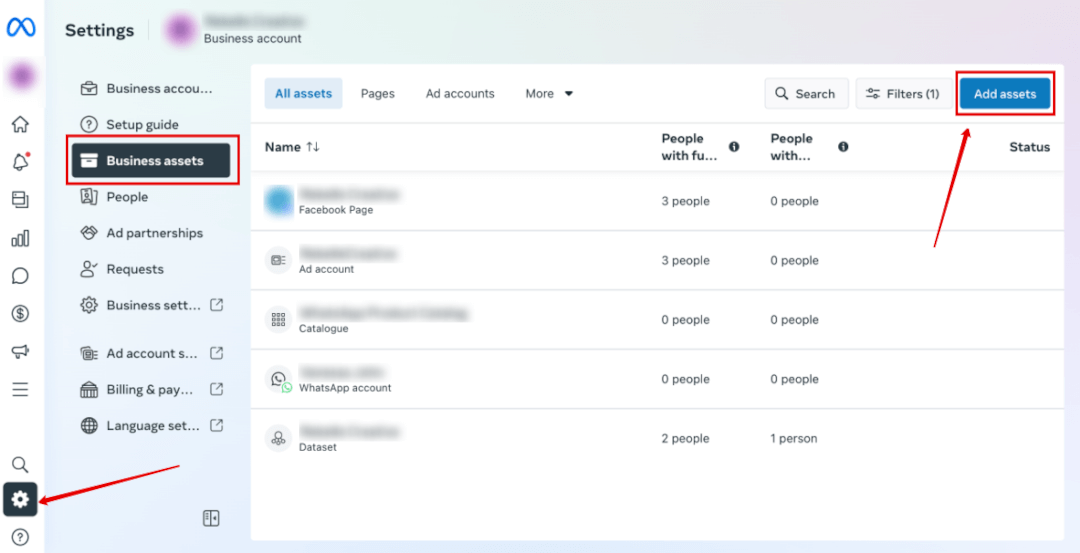
You can add an ad account to Meta Business Suite from several places. The ‘Account overview’ page will prompt you to add one like in the image below.
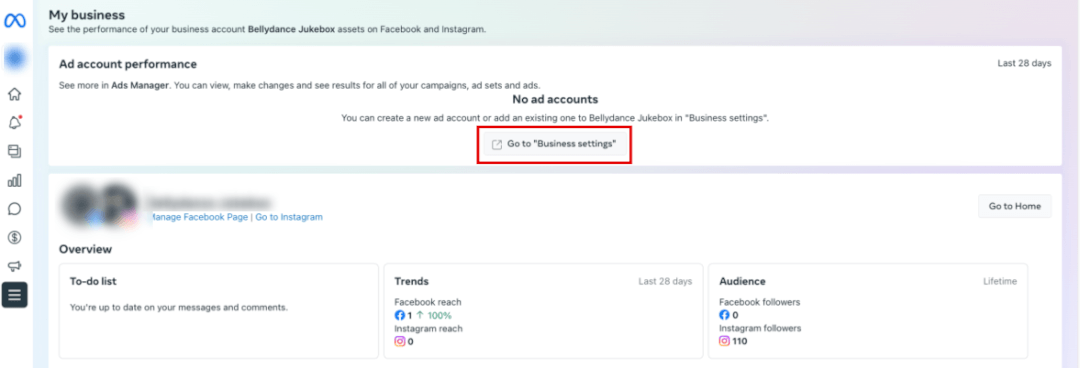
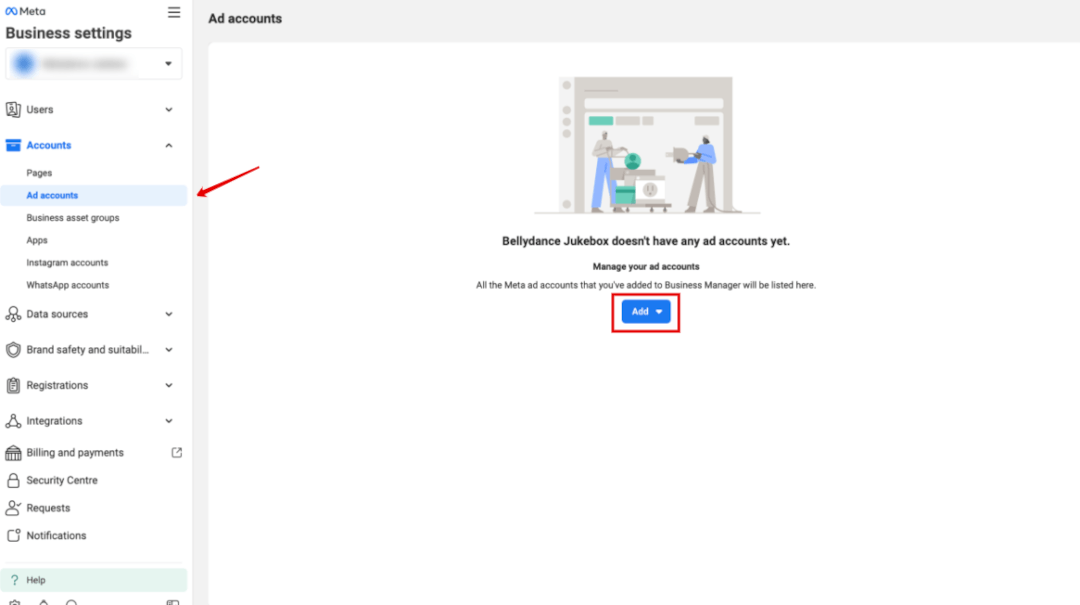
Click ‘Go to “Business settings,”’ which will open up a new tab where you can click the ‘Add’ button.
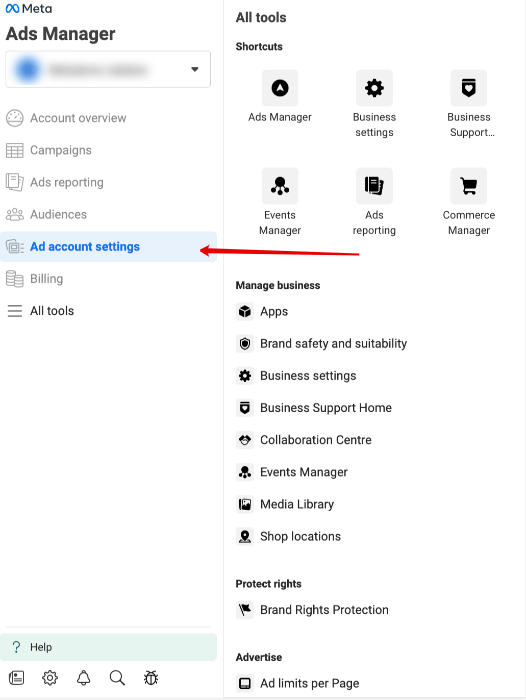
Or, you can go directly to the ‘Ad account settings’ in the Meta Ads Manager.
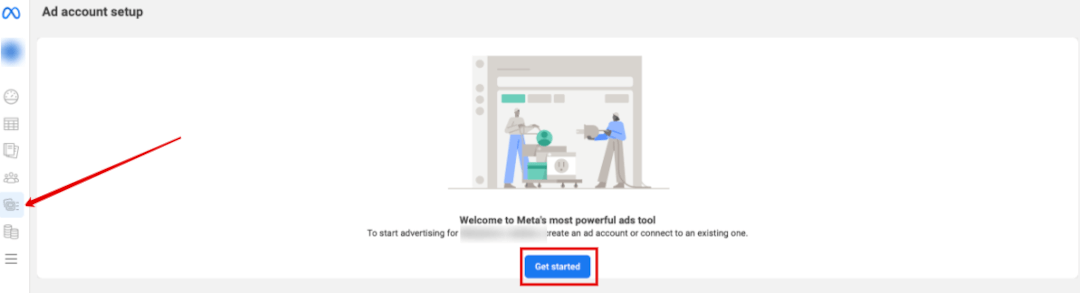
You’ll land on the page below, where you can click ‘Get started.’
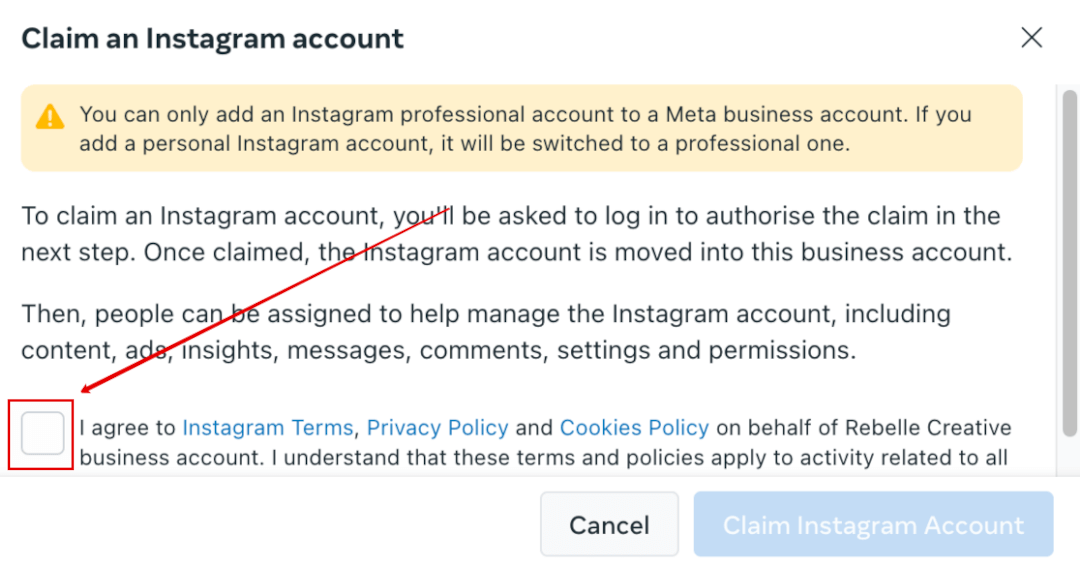
Once you click on the button, a popup will appear where you can either create a new ad account, claim an existing one, or request to share a new account.
If you’re creating a new one, you can follow the prompts and use our step-by-step guide to set up your Meta ad account.
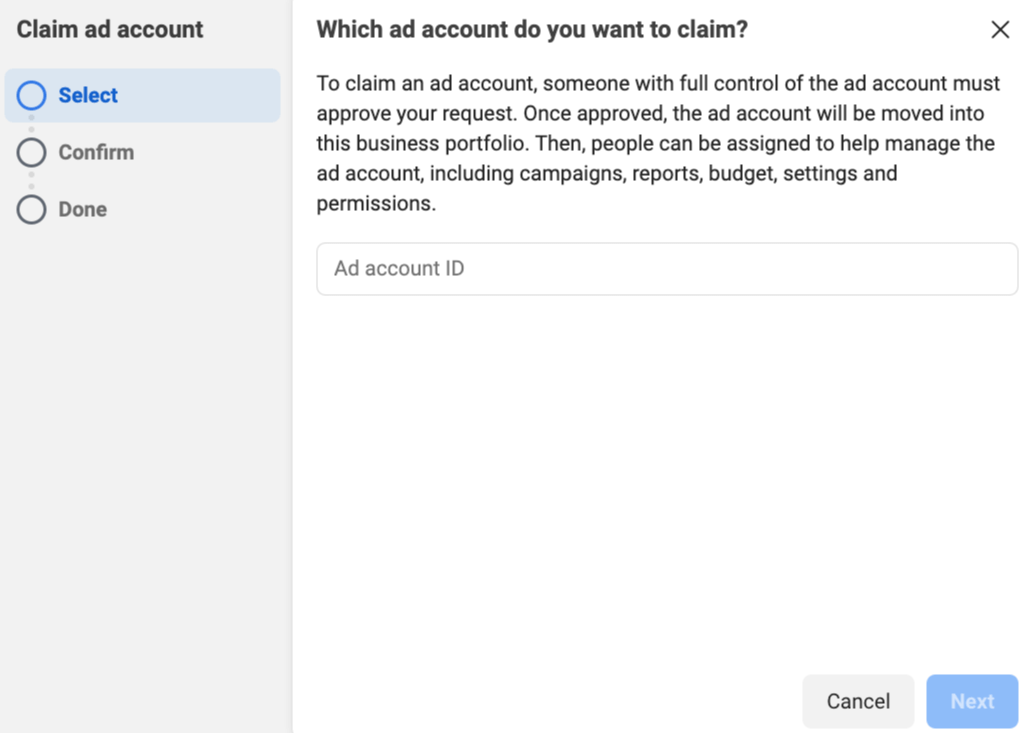
To claim an existing ad account, you will be asked to enter the ad account ID on the next screen. Your ad account should be available for selection in the next prompt.
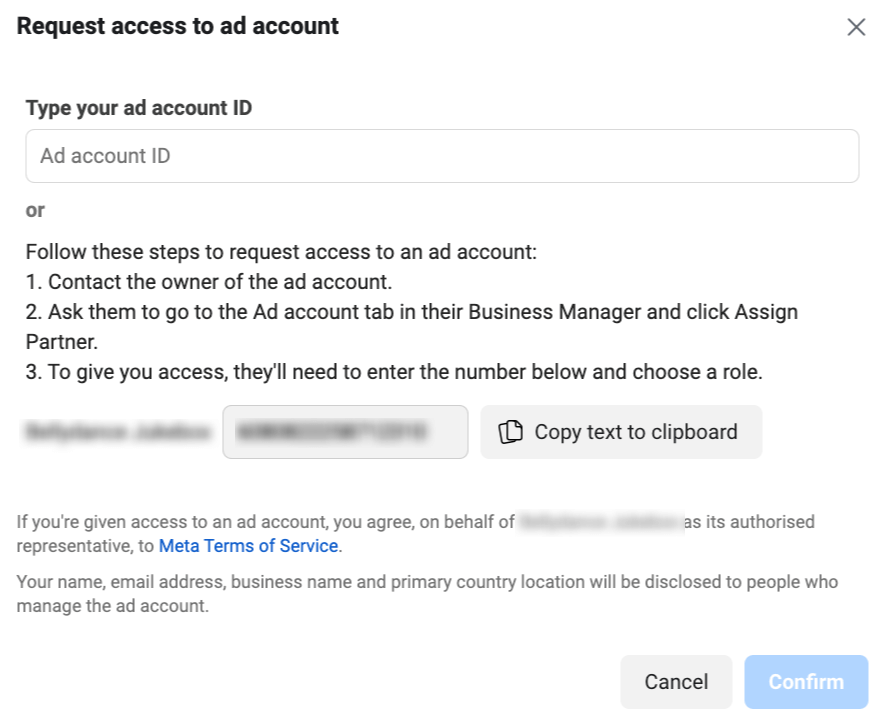
Or, you can request access to an ad account owned by another business. You can enter the ad account ID or you can request the owner to assign you as a partner using the number that you can copy in the popup.
Once you confirm your selection of any of the above options, you’ll have access to the ad account.
For a deep dive into understanding Facebook analytics, we recommend you read this article.
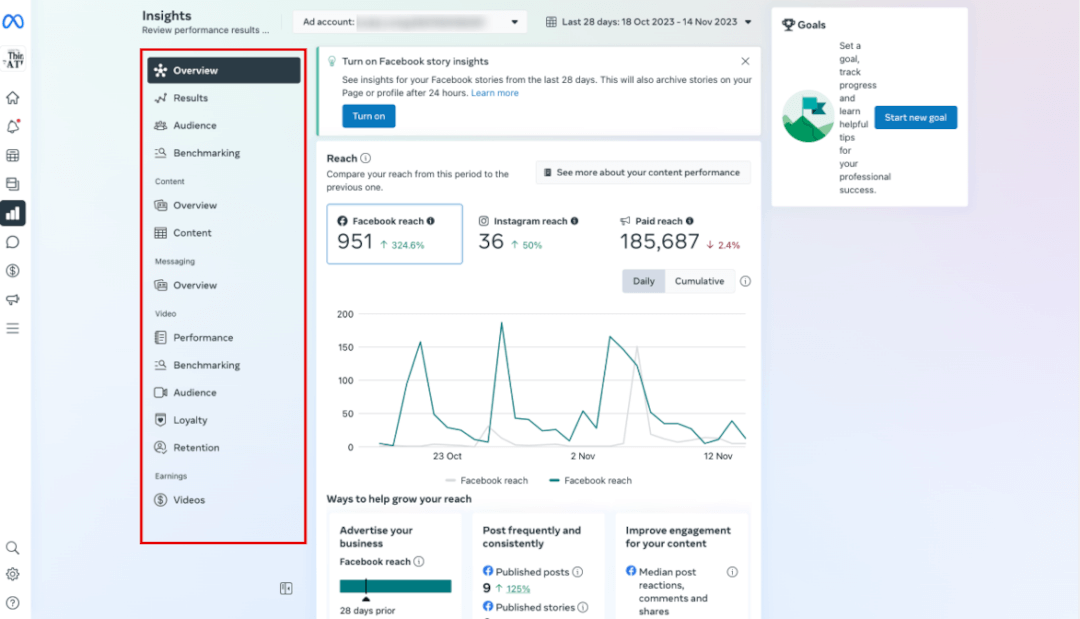
If you look at the highlighted Insights menu that’s highlighted, you’ll see that it’s broken down into sections, including all results, content, messaging, video, and earnings analytics.
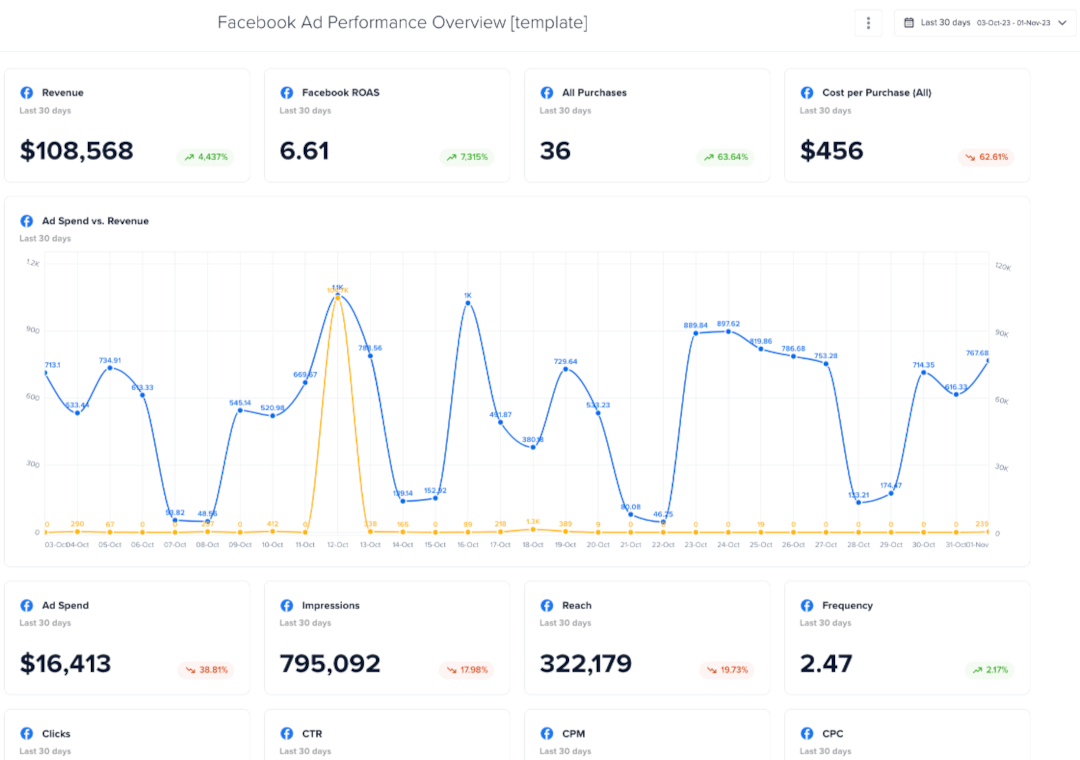
With so many options, Meta’s Insights can sometimes be overwhelming. For an even simpler reporting solution that consolidates multi-channel data and customizable dashboards, try Madgicx’s One-Click Report. You can blend and compare your Meta analytics with your other platforms for a zoomed-out view of your advertising - all in one place. Try it free for 7 days.
Discover the various tools available within Meta Business Suite that can enhance your online management experience.
While it may seem underwhelming at first glance, the consolidated inbox in Meta Business Suite is awesome. You can track messages from Messenger, Instagram DMs, ads, and all comments across these platforms. In addition, you can set up automated responses, monitor your messaging analytics, create messaging ads, and adjust your messaging settings in the highlighted section at the top of the page.
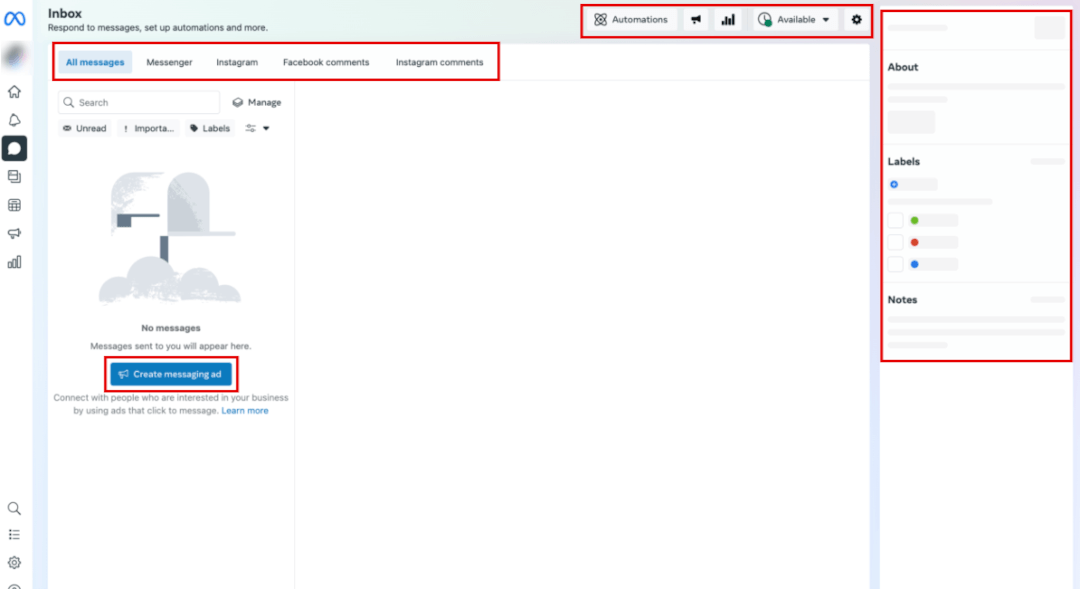
Then, in the highlighted box on the far right, you can assign team members to conversations, prioritize and label them, and store information about your interactions with the person. This way, everyone on your team will be able to see this information, much like a CRM system.
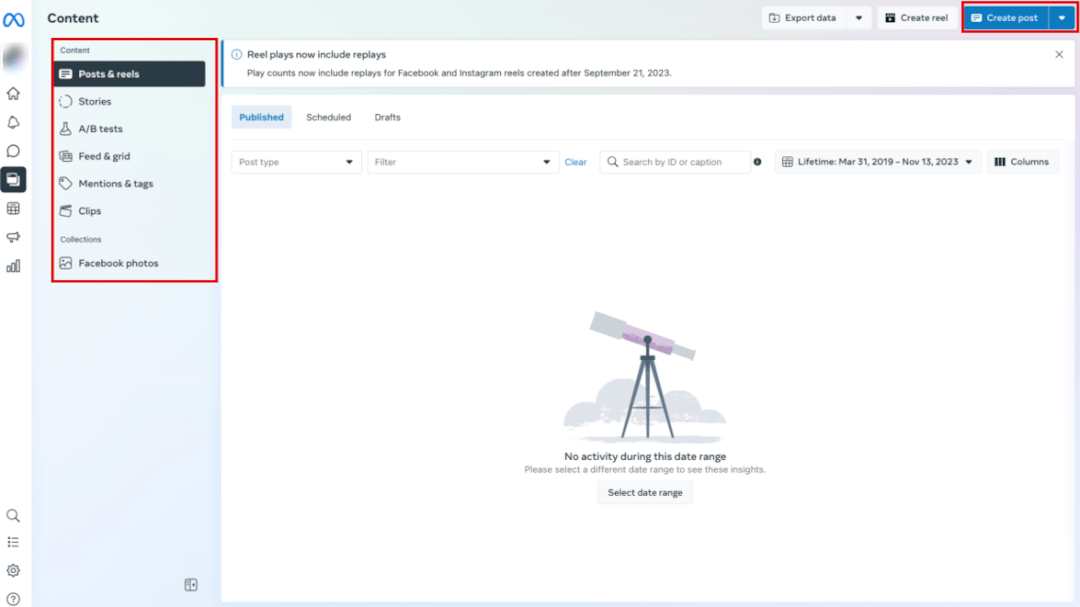
Essentially, the Content section is a bank of all of your content: posts, reels, stories, video clips - even A/B tests, mentions, and tags. You can also manage all of your Facebook photos conveniently from this section.
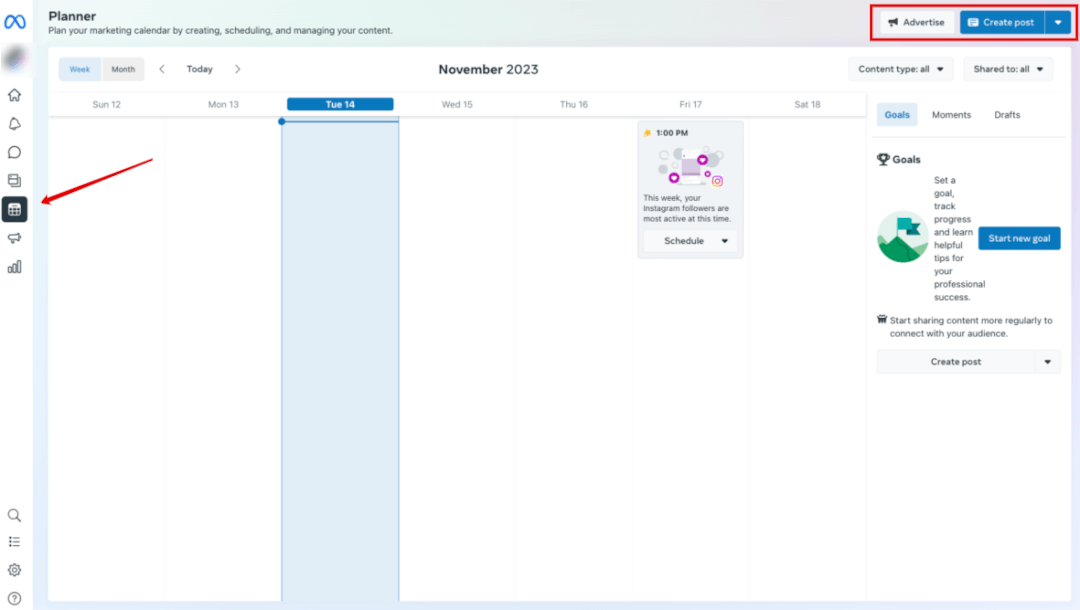
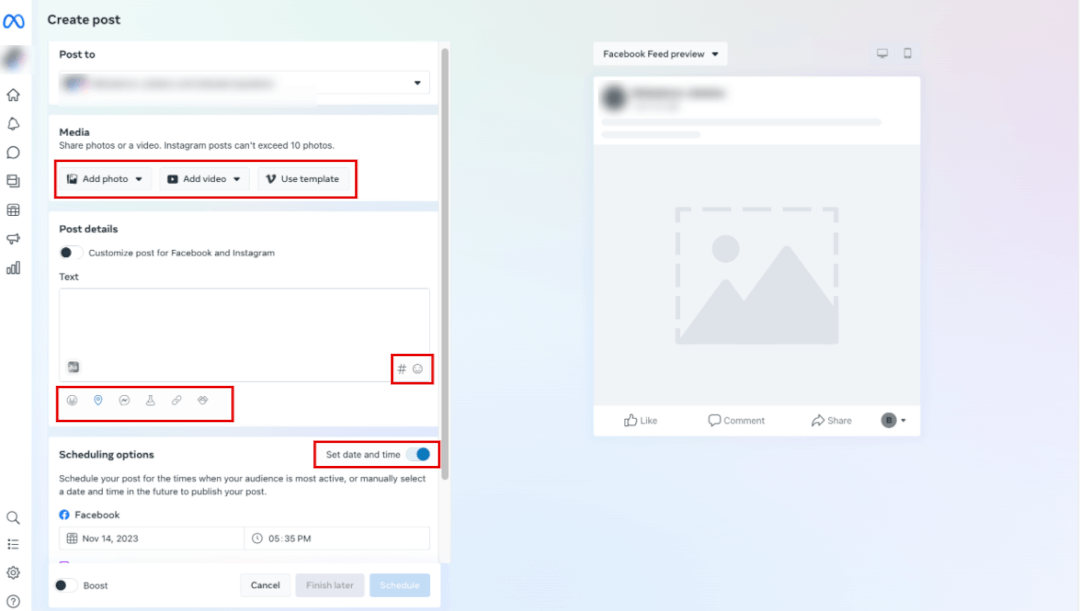
Planner, previously known as Creator Studio, is your command center where you can create posts, reels, and stories to publish immediately or schedule for later. Meta even recommends the best time to post for your followers so you don’t have to guess. As it has a calendar view, you can see all of your posts across Meta platforms at a glance and easily reshuffle as needed.
Furthermore, you can create ads from here, too.
One of my favorite features of the Planner is the ability to store frequently used hashtags and create a bank of them to use in your posts.
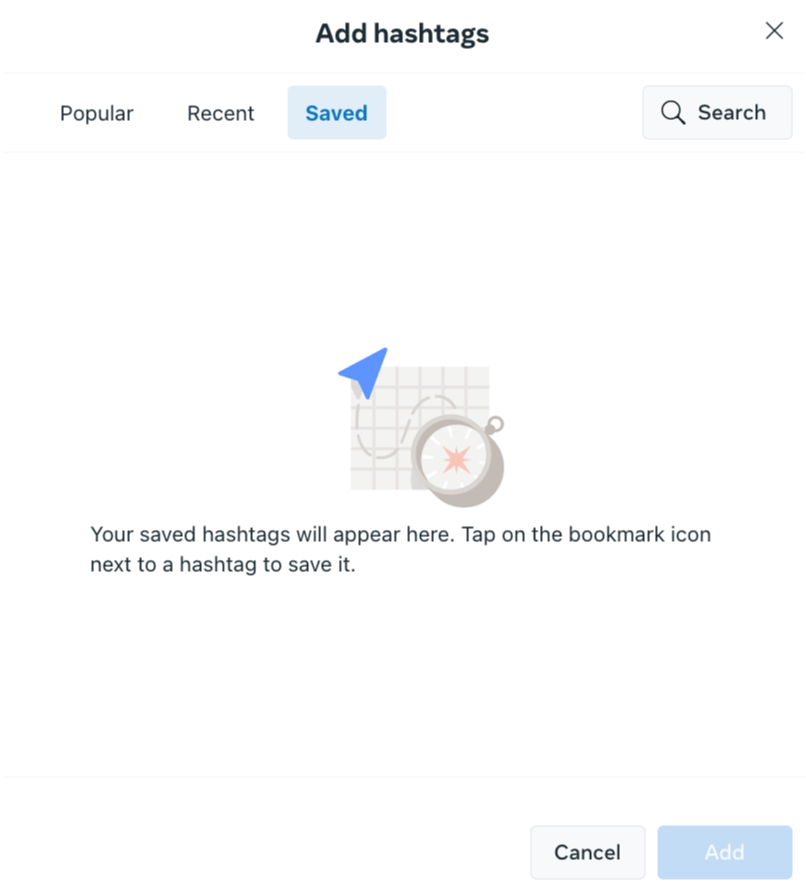
You can find your hashtags easily by clicking on the # button next to the emoji button when creating a post. As you can see in the image below, the post-creation tool is very similar to Facebook, and you simply slide the toggle to schedule the post versus posting immediately.
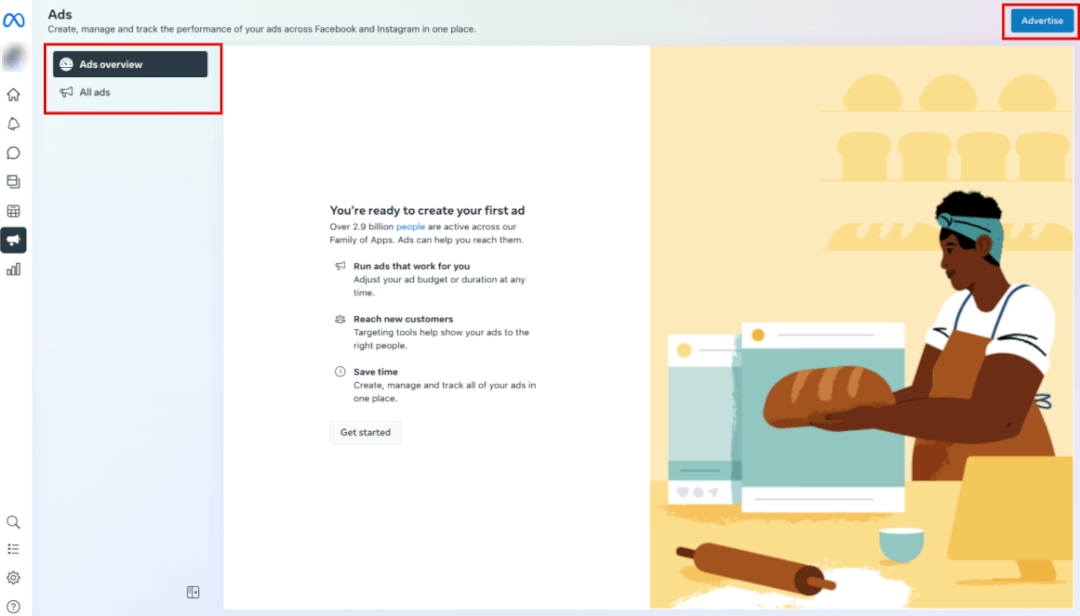
Firstly, the Ads section is very different from the Meta Ads Manager. The Business Suite Ads section is a simplified version of the Ads Manager and is intended for team members to easily create ads and boosted posts. The Meta Ads Manager is an advanced tool dedicated solely to ad management, whereas the Business Suite covers the basics of the tools needed to run a business online.
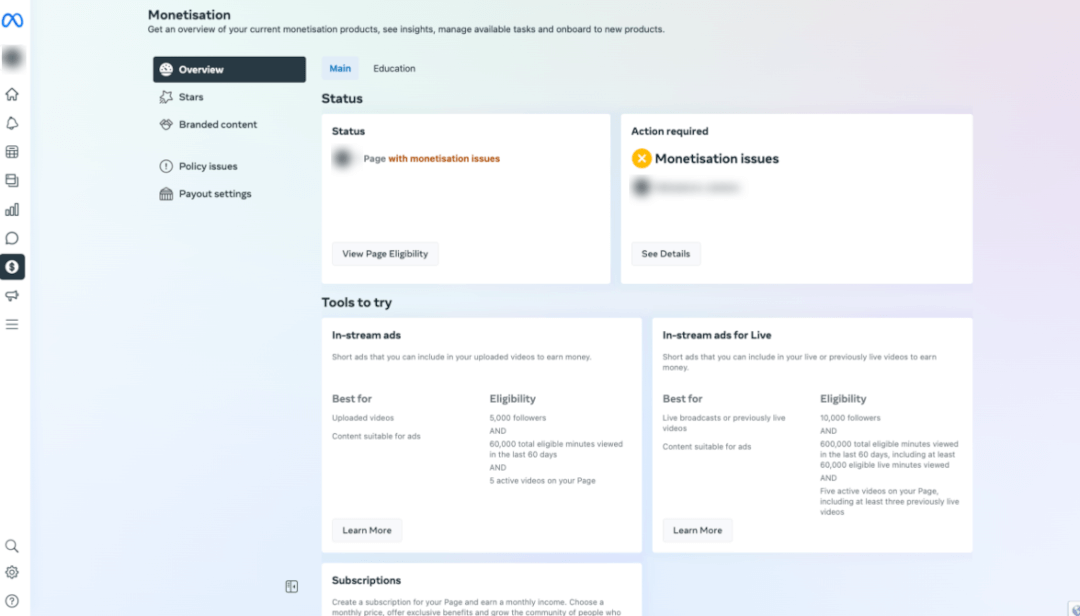
Monetizing your page and managing your branded content is essential for brand pages and influencers. You can even set up a subscription channel for your fans for premium content or earn money from ‘Stars’ in your Live videos. This section is where this aspect of your channel is managed.
Using a comprehensive platform like Meta Business Suite is a fork in the road for businesses. Gone are the days of manual updates from this point on! From streamlined content management to analytics with seamless team collaboration, Meta Business Suite offers a holistic solution for businesses to manage their social media. Plus, you can give customized access to your team without compromising your assets.
That being said, some advertisers don’t enjoy using Meta Business Suite and find it complicated to navigate. They prefer to use software tools instead to easily manage their social media under one roof.
If you can relate to this and you’re ready to raise the roof on your Meta advertising, give Madgicx a spin. Madgicx is an all-in-one solution to optimize and streamline your cross-channel advertising. It helps you make data-led decisions and lets you delegate tedious work to the AI Marketer. Plus, you can try it for free for 7 days.
Manage your ads simply and effectively with Madgicx! Optimize your ads, identify high-performers, and trim budget waste using Madgicx's suite of tools. Get your ads ship shape for smooth sailing.

As a content and technical writer, my goal is to help business owners and advertisers navigate the digital landscape.

.jpg)

